Add New Users to Microsoft Teams Phone Connector
Table of Contents
Add Users via the Teams Connector Provisioning Portal Adding Users From the Partner Provisioning PortalScope:
Intended Audience: White Label Partners, and above
The document will go over adding new users to both the Teams Connector (TPPP) and Partner (PPP) Provisioning Portals in Microsoft Teams Phone Connector
Requirements
- Access to either the Teams Connector or Partner Provisioning Portal
- Completed steps 1-3 up until Configure PBX Settings
Add Users via the Teams Connector Provisioning Portal
- Log into the Teams Connector Provisioning Portal using the tenant's Global Administrator O365 user
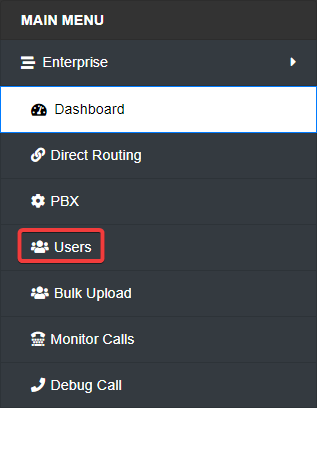
- In the main menu, navigate to Users
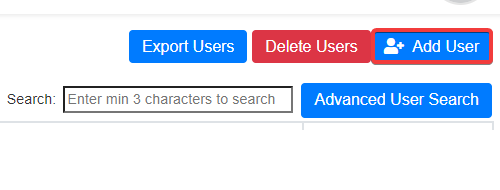
- Select Add User in the upper right-hand corner
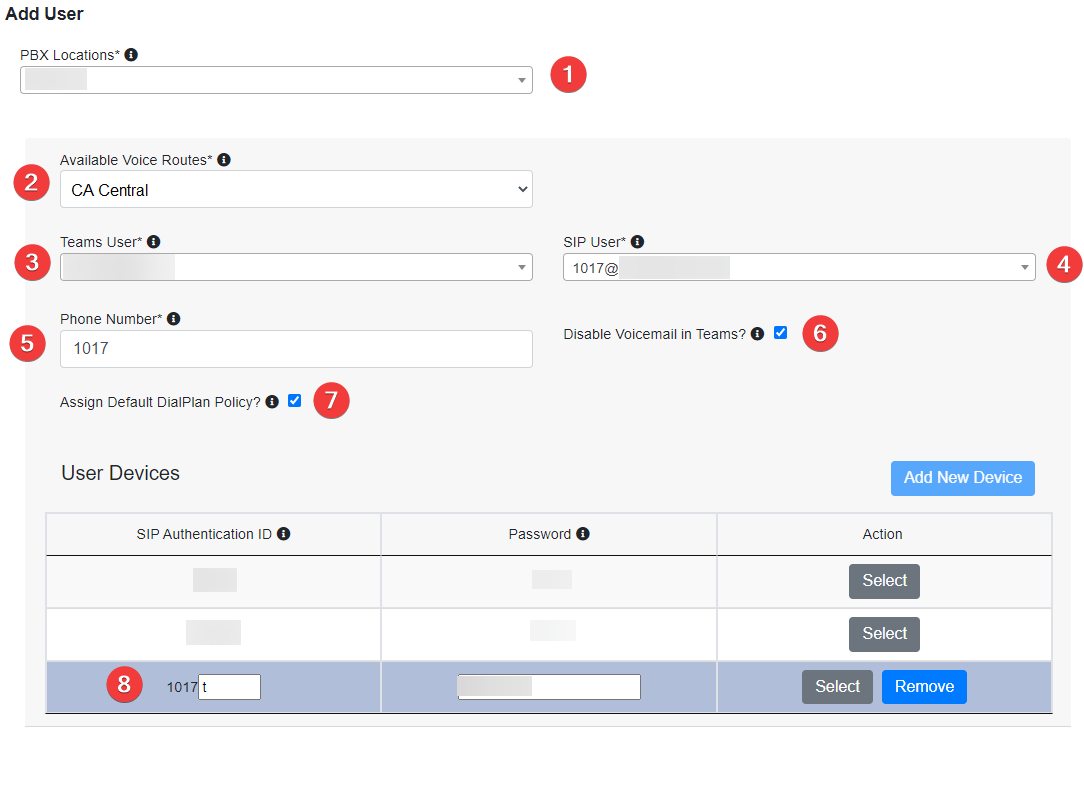
- For the user details, enter in the following info:

- PBX Locations: The name of the (typically PBX; usually only one option in the dropdown)
- Available Voice Routes: Either CA Central or US West, depending on the client's location
-
Teams User: the email address/ username associated with the user you're trying to add
- Note: this user needs to be assigned the correct licensure, or they will not show in the dropdown
- SIP User: The user's portal extension (cannot already be assigned to another user)
- Phone Number: The phone number will auto-populate with the default Caller ID assigned to the PBX user in the Manager Portal. Change this to the user's extension number.
- Disable Voicemail in Teams?: Check the box. Leaving this unchecked will prevent calls from reaching the user's PBX voicemail and can also cause issues with call queue routing.
- Assign Default DialPlan Policy?: Check the box
- User Devices: Click Add New Device and then add the following information:
- SIP Authentication ID: t
-
Password: Generate a random and secure 8-character, alphanumerical password using whatever password generator you prefer and paste it into this field.
NOTE: It is important not to include special characters in the password. - Action: Select
- Click Add User
- Navigate back to the Dashboard from the Main Menu
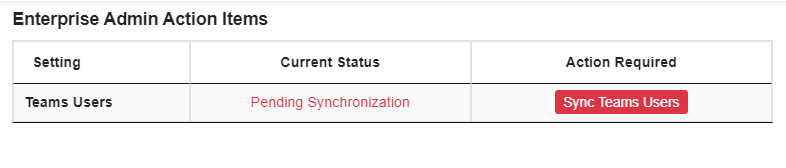
- Under Teams Connector Admin Action Items, you may see an option to Sync your Teams users. If this option is present, click Sync Teams Users. Otherwise, the user was synced automatically, and you may proceed to the next step.
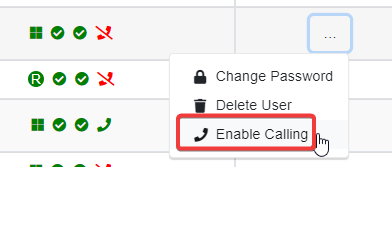
- From the main menu, navigate back to Users, locate the user(s) you just added, click the three dots next to the user under the Action tab, and click Enable Calling if this option is available. If it says Disable Calling, this was enabled automatically and you can skip this step.
Adding Users From the Partner Provisioning Portal
- Log into the Partner Provisioning Portal using your Partner login
- Navigate to Enterprises > the Microsoft Tenant you'd like to add a new user to > Users > Add User

- For the user details, enter in the following info:
- PBX Locations: The name of the configured PBX (typically PBX; usually only one option in the dropdown)
- Available Voice Routes: Either CA Central or US West , depending on the client's location
-
Teams User: the email address/ username associated with the user you're trying to add
- Note: this user needs to be assigned the correct licensure, or they will not show in the dropdown
- SIP User: The user's portal extension (cannot already be assigned to another user)
- Phone Number: The phone number will auto-populate with the default Caller ID assigned to the PBX user in the Manager Portal. Change this to the user's extension number.
- Disable Voicemail in Teams?: Check the box. Leaving this unchecked will prevent calls from reaching the user's PBX voicemail and can also cause issues with call queue routing.
- Assign Default DialPlan Policy?: Check the box
- User Devices: Click Add New Device and then add the following information:
- SIP Authentication ID: t
-
Password: Generate a random and secure 8-character, alphanumerical password using whatever password generator you prefer and paste it into this field.
NOTE: It is important not to include special characters in the password. - Action: Select
- Click Add User
- Request the O365 tenant's Global Administrator user to log into the Teams Connector Provisioning Portal, enable calling for the user, and then sync their users using steps 6-8 above.