Talk-A-Phone VOIP-500 Setup
Prerequisites
- VOIP-500
- Firefox 3.5 or higher
- Internet Explorer 8 or higher
User Setup
This device will need to be set up manually. Please see the link here for complete instructions on setting up a manual device.
Device Setup
- Enter the IP address of the VOIP-500 phone into either Firefox or Internet Explorer 8 or higher. Default IP: 192.168.1.10
The WebGUI will not work in Google Chrome - You will be prompted for a username and password.
Defaults: admin/admin@123 - From the left-hand Menu, select Network and then SIP Settings

- Here you will enter your SIP information.
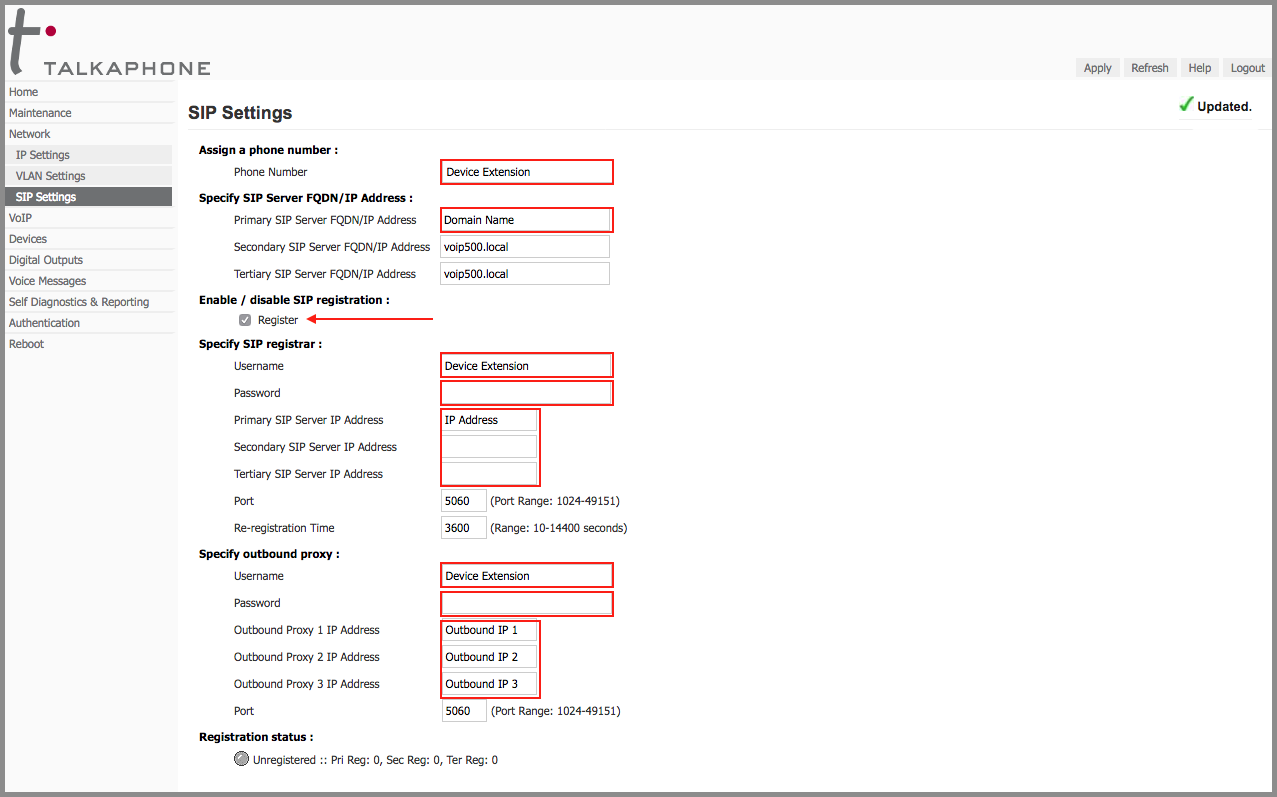
- Click the Register option before entering the Registrar credentials.
- Device Extension - Extension created earlier
- Domain Name - Domain that the extension belongs to
- IP Address - 74.3.187.228
- Outbound IP 1 - 74.3.187.228
- Outbound IP 2 - 74.3.187.232
- Outbound IP 3 - 97.107.185.100
- Click apply and wait for the registration status to turn green.

- The VOIP-500 phone is now registered and able to receive phone calls.
Button Setup
To enable the button on the phone's face to dial a number, extensions or DIDs need to be added to the number lists on the phone. These lists work in a linear cascade fashion: It will try the first number, and if there is no answer, it will move on to the next.
- From the left-hand menu, select VoIP and then Number Lists.
- This will open the list's options. Enter up to 6 extensions/DIDs per list.

- Click Apply
 When the red emergency button is pressed, it will dial the numbers in the list. The call placed light will turn on, and when the call is answered, the call received light will turn on for the duration of the call.