Grandstream HT81x Setup
Prerequisites
- Access to the HT81x WebGUI
- Office Manager or higher user scope
- Manual device credentials are found here
- SIP Trunk credentials will require a partner account or support to assist.
This article will explain how to set up the basic functionality of the Grandstream HT81x ATA, which can be used for both SIP trunks and single connections.
Ensure the admin login password is changed from the default
SIP Account Setup
- Log into the HT81x WebGUI
- Locate the Profile 1 section from the top menu.

- Fill in the appropriate manual device information. These will be the foundation of the registration.

- Profile Active - Yes
- Primary SIP Server - will be the domain name to which the device will be registered.
- Prefer Primary SIP Server - Yes
- Outbound Proxy - will be the outbound proxy provided where the manual device credentials were obtained.
- Prefer Primary Outbound Proxy - Yes
- SIP Transport - UDP by default
- NAT Traversal - UPnP
- DNS Mode - SRV
- DNS SRV use Registered IP - Yes
- Registration Expiration - 1
- Outgoing Call without Registration - No
- Some additional settings to optimize the registration and functionality of the device.
- Use Random SIP Port - Yes
- Use Random RTP Port - Yes
- Allow Incoming SIP Messages from SIP Proxy Only - Yes
- SIP REGISTER Contact Header Uses - WAN Address
- Preferred DTMF method - Set all Priority options to RFC2833 (we only support RFC2833)
- Enable Call Features - No (all call features are handled by our system)
- Preferred Vocoder:
- PCMU
- G729
- PCMU
- PCMU
- PCMU
- PCMU
- PCMU
- Press the Apply button at the bottom of the page to apply the settings before continuing.
- Locate the FXS Ports section from the top menu
- Set the following per line

- SIP User ID - SIP username provided from manual device setup instructions
- Authenticate ID - SIP username provided from manual device setup instructions
- Password - SIP Password provided from manual device setup instructions.
- Enable Port - Yes
*The other options can be left blank unless required for a more advanced setup.
- Press the Apply button at the bottom of the page to apply the settings.
Once the above has navigated back to the Status section, the line will now show as Registered
Per Line Registration
If each line is to have its own registration, follow step 7 for each additional line, providing the unique username and password combination for each line. Then, press apply to apply the settings.
This will allow multiple extensions to be uniquely rung by their individual extensions.
This will allow multiple extensions to be uniquely rung by their individual extensions.
SIP Trunk Registration
When using the HT81x with a SIP trunk, the outbound proxy will need to be set to sip.siplogin.ca
The steps to use the SIP Trunk registration are mostly the same as above, but you will register only one line. The difference is setting the hunt group option.
- Set Port 1 Hunting Group to be Active

- For each additional Port, set the Hunting Group to 1; this enables all other lines to be rung in the Huntgroup fashion of either Circular or Linear.that rings

SIP Trunk Only - If you wish to have a specific number only ring a specific line, you can add the DID in 11 digit format to the desired Ports Request URI Routing ID setting. 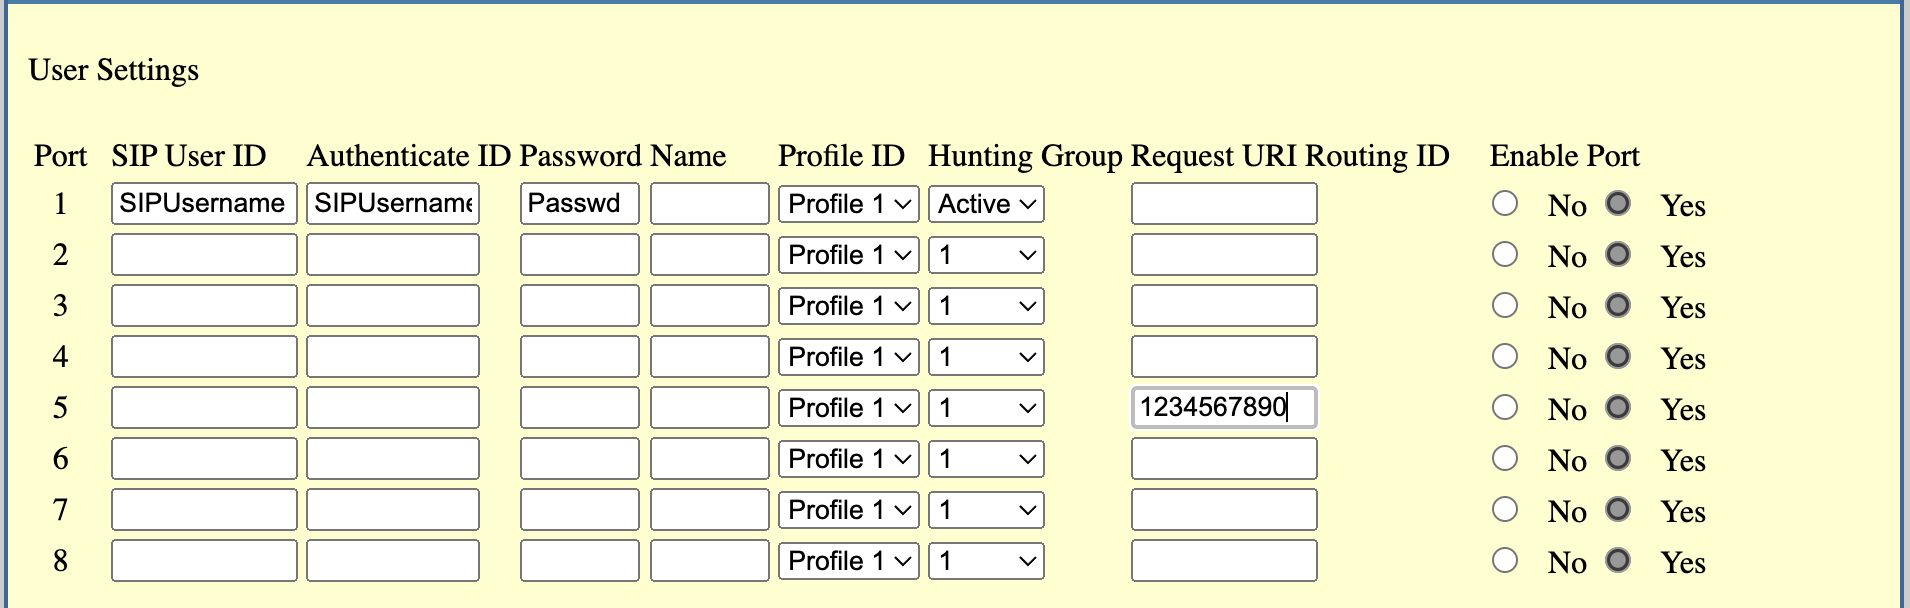 This will tell the system that any inbound call to 1234567890 will ring port 5 only.