Add Users as a Partner
Allowing the Microsoft Enterprise to authenticate the changes made in Microsoft Office requires a two-step process. But with the release of Microsoft Teams Phone Connector 2.6.0, the Microsoft Tenant Admin can grant consent for Partners to perform this task without additional interaction from the Microsoft Tenant.
(See Granting Consent for Service Providers to Perform Tenant Provisioning for more information.)
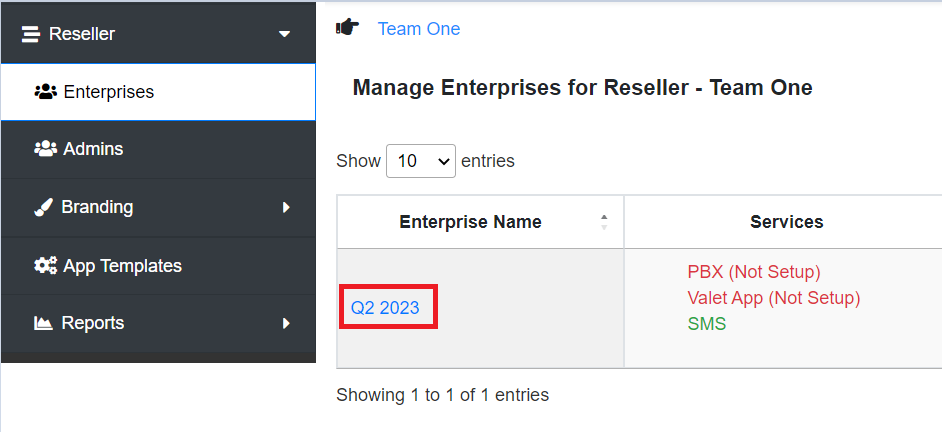
Step 1. Reseller Adds/Deletes User(s)
- Select the Enterprise you want to add a user into.
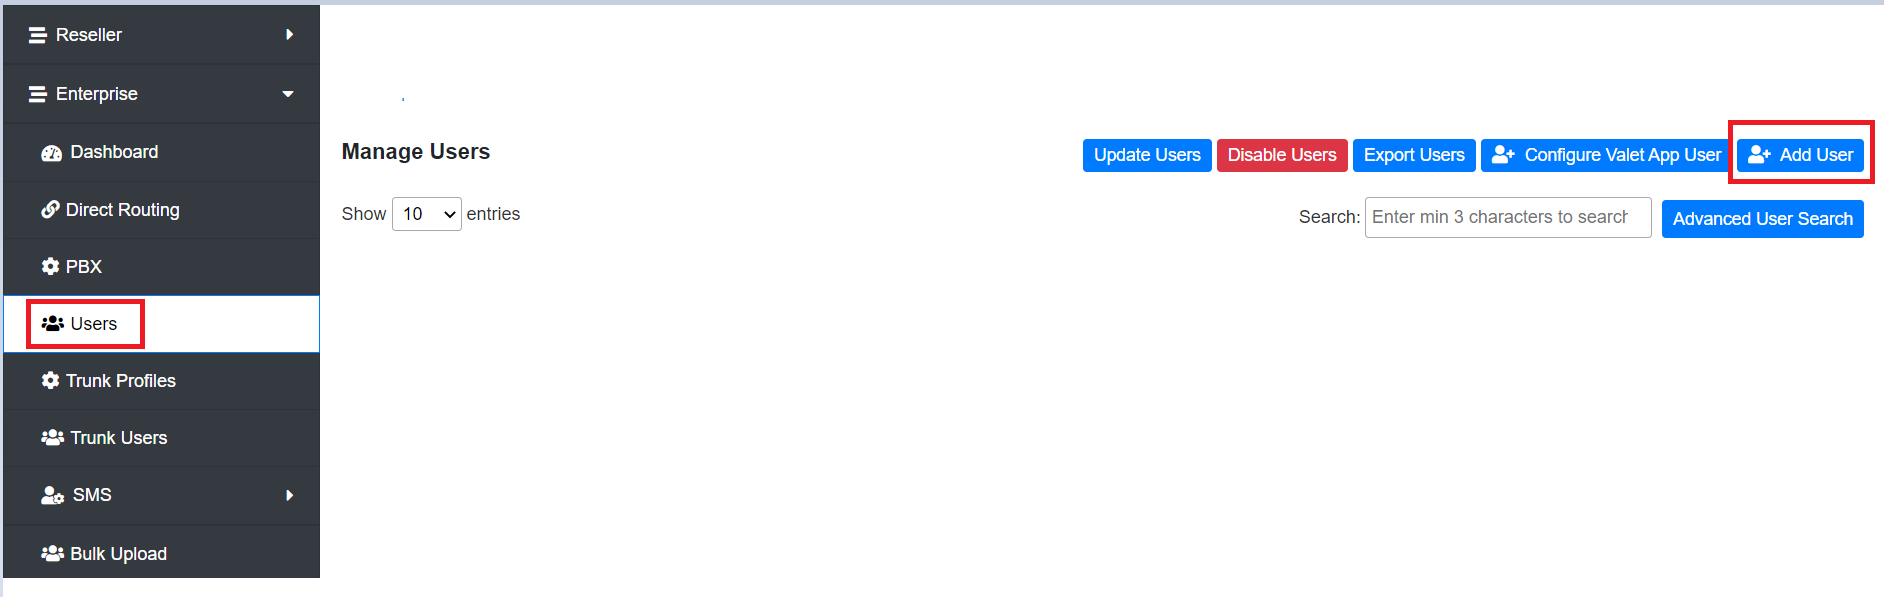
- Navigate to Users >> Add User.
- Choose the PBX location, Voice Route and User in the dropdown. Enter their Phone Number and SIP Credentials. Disabling Teams Voicemail is an option and adding Portal Credentials is optional (only if you are embedding your Portal in the Teams Application). Select Add User when you have successfully completed the form.
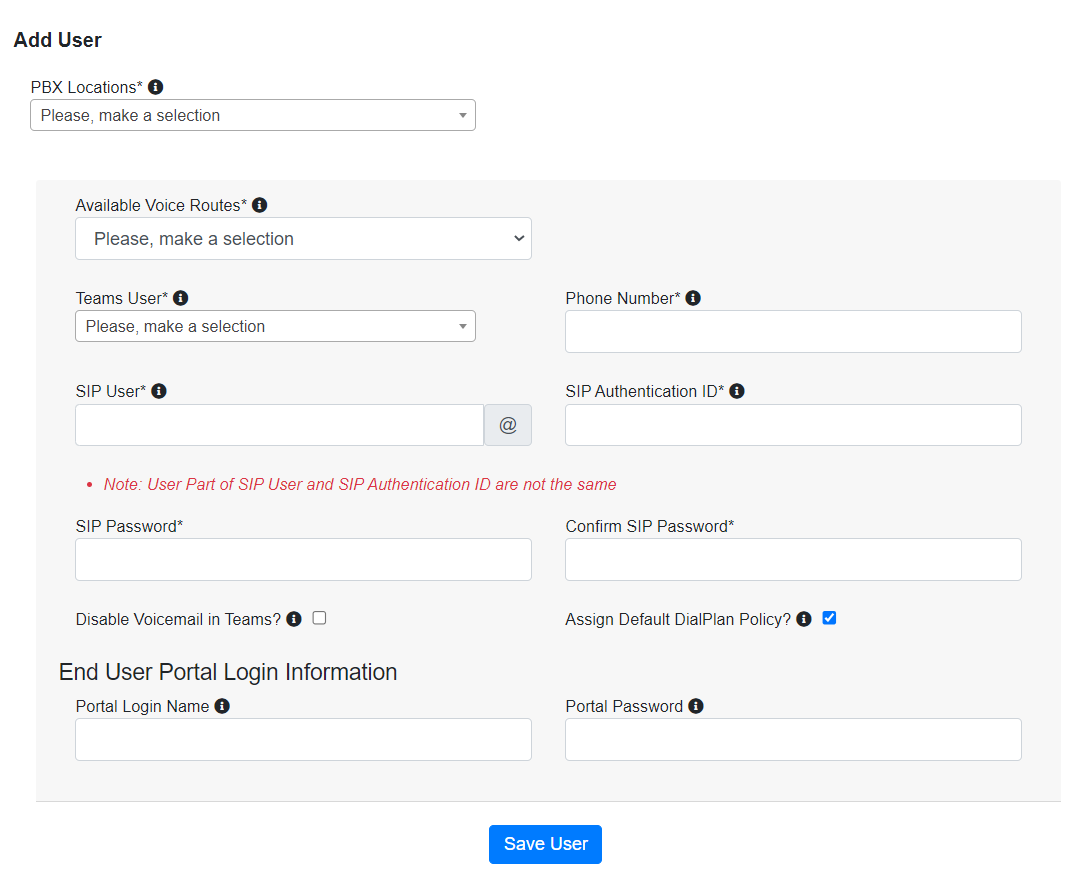
The Phone Number you add can be a full number (e.g., 4133316100) or an extension (e.g., 1008). It will appear appended with the E164 country code of the Microsoft User as set in User Location. The numbers in the US example above will appear in Teams as +14133316100 and +11008, respectively. - Upon successfully adding a User, you will be redirected to the Enterprise Dashboard page. The newly added user will be visible.<
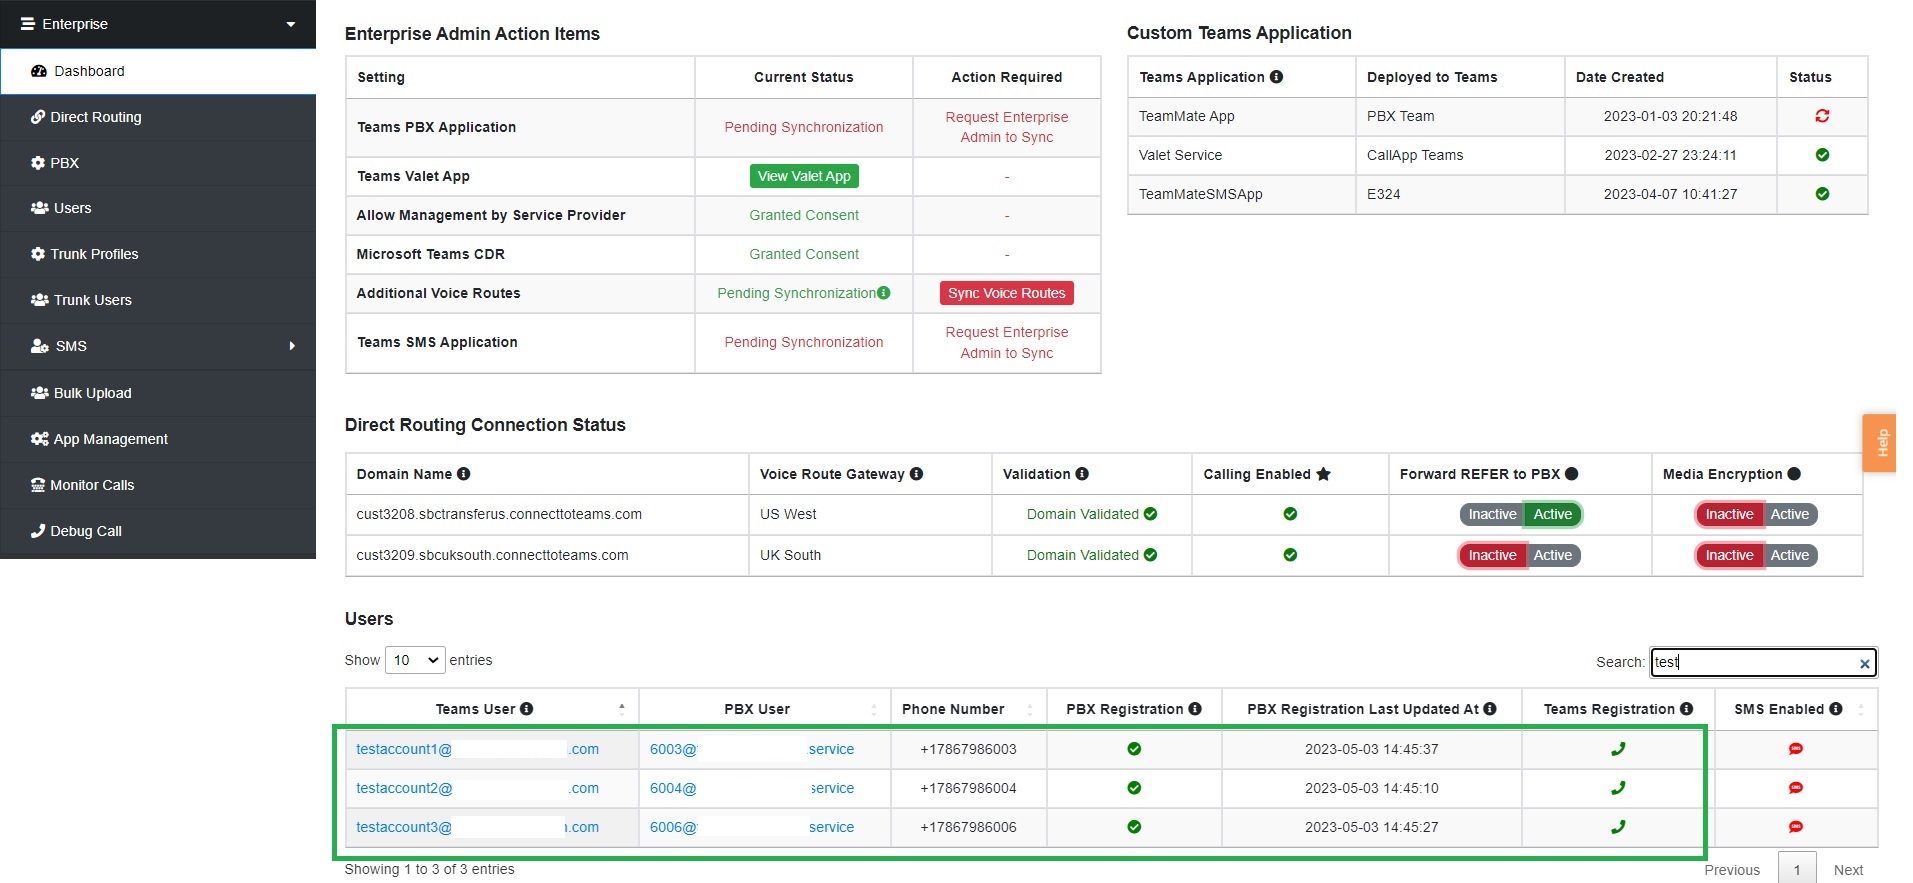
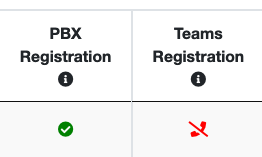
The dashboard should display a green checkmark under PBX registration and a red “x” on a phone under Teams Registration.
Step 2. User Sync
The Microsoft Global Admin or the Microsoft Teams Service Admin/Skype Admin of the Enterprise MUST sign in to the Enterprise portal and perform a sync to complete the Teams Registration and active Teams Calling.
The service provider can perform the user sync task if the enterprise admin grants consent for Enterprise Management.