Teams Add Trunk
Table of Contents
Add Trunk Profile
Add Trunk Profile
This article provides guidance for filling out the form to add a trunk profile from the reseller provisioning portal.
From the Enterprise Dashboard, Navigate to “Trunk" then "Profiles” and click "Add Trunk Profile" in the upper right corner.

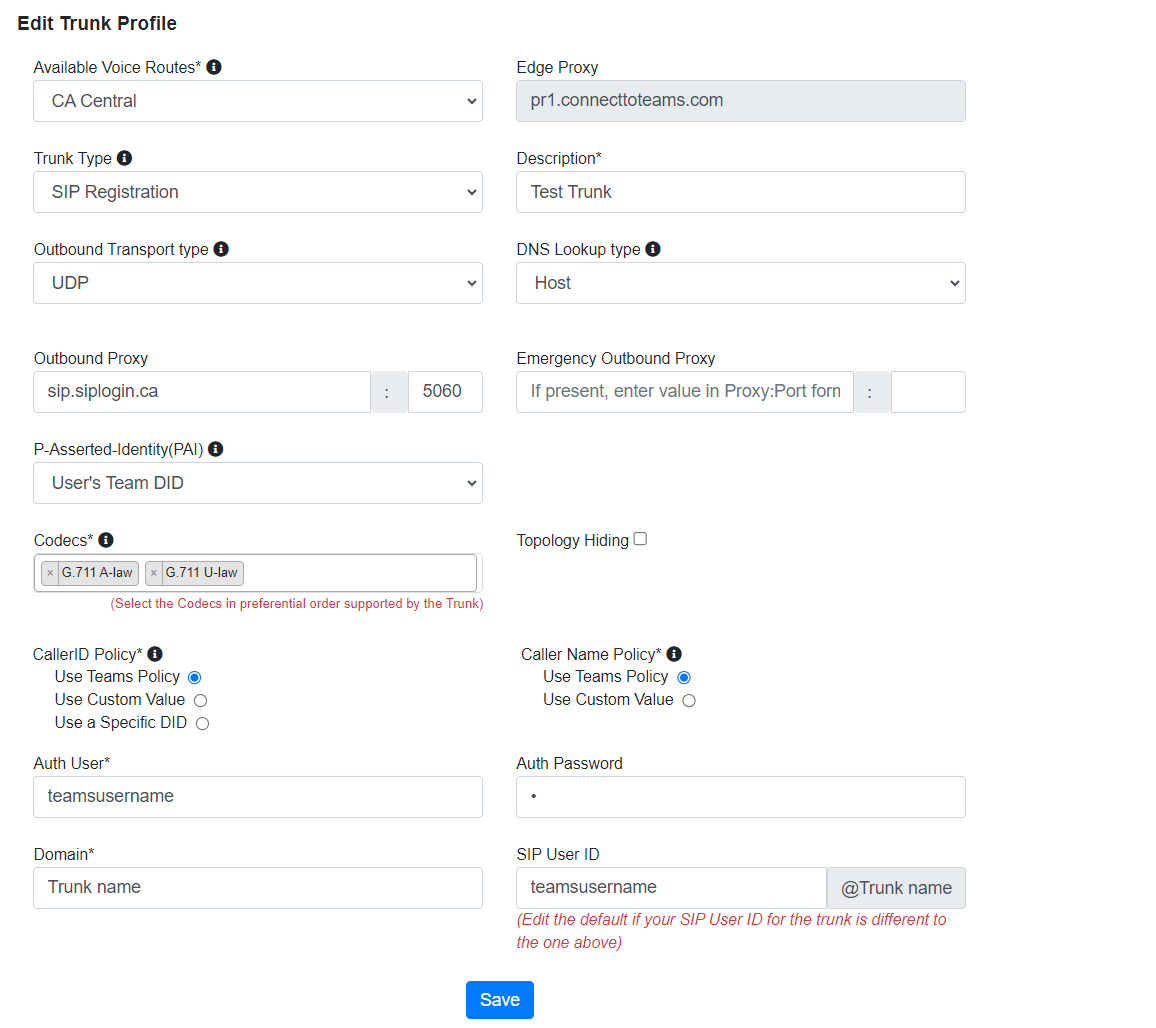
Available Voice Routes: Select one of your already-configured voice routes from the dropdown menu.
Trunk Type: Select the type of Authentication that your Trunk supports.
Description: What part of the business will this trunk service? Example: "Customer Service Trunk," or "Downtown Office."
Outbound Transport type: Select UDP, TCP, or combination.
DNS Lookup type: Host or SRV. NOTE: DNS/SRV is incompatible with proxy addresses, including ports. If your proxy address requires a port, you must use HOST.
Outbound Proxy and Port: sip.siplogin
Emergency Outbound Proxy and Port: Enter if configured on the trunk side. This is optional.
P-Asserted-Identity(PAI): Choose if it is from a number, the trunk default number, the trunk SIP user ID, or none.
Codecs: Select your codecs in order of preference; codecs will be attempted in the order you arrange.
Topology Hiding: check if you want to enable Topology Hiding
CallerID/Name Policy: Give you the option to customize the Caller ID and Caller Name transmitted to upstream systems for outbound calls.
Domain: SIP Domain. Refer to the client's account.
SIP User ID: This may be the same as the “Auth User” above, but some providers differentiate between SIP user names and SIP user IDs. This field will automatically populate as "(Auth User)@(Domain)" as you fill in the rest of the form. Review for accuracy before submitting.
Auth User: SIP User name
Auth Password: SIP Password
When complete, click "Add Trunk Profile" and review its status on the "SIP Trunk Profiles" page.
