Windows OS SIPTAPI Installation Guide
Table of Contents
Prerequisites: Prerequisites Download SIPTAPI Install SIPTAPI (32 bit Windows) Install SIPTAPI (64 bit Windows) Add TAPI Provider Removing Country Code to process calls through 10-digit Rule Testing Additional Integrations Outlook 2013 IntegrationPrerequisites:
- Portal access
The Windows Operating System includes TAPI as an abstraction layer that allows applications to initiate calls using a standard programming interface. It can be used by applications such as Microsoft Outlook, ConnectWise, and many CRMs to initiate calls from inside the program. Support will not set up these features, and limited support will be available. Whoever is performing these changes must be fully capable of accepting complete responsibility for the function of SIPTAPI. We only offer basic support and provide this for informational purposes. SIPTAPI is considered a "manual" device.
Prerequisites
- Portal access
Download SIPTAPI
- Using any web browser, download SIPTAPI from http://sourceforge.net/projects/siptapi/files/
Install SIPTAPI (32 bit Windows)
- Unzip the download and copy the 32-bit release version of siptapi.tsp into c:\windows\system32
- Reboot your computer
Install SIPTAPI (64 bit Windows)
- Unzip the download and copy the 64-bit release version of siptapi.tsp into c:\windows\system32
- Copy the 64-bit release version of siptapi.tsp into c:\windows\syswow64
- Reboot your computer
Add TAPI Provider
- Open Control Panel
- Search for then click on Phone and Modem
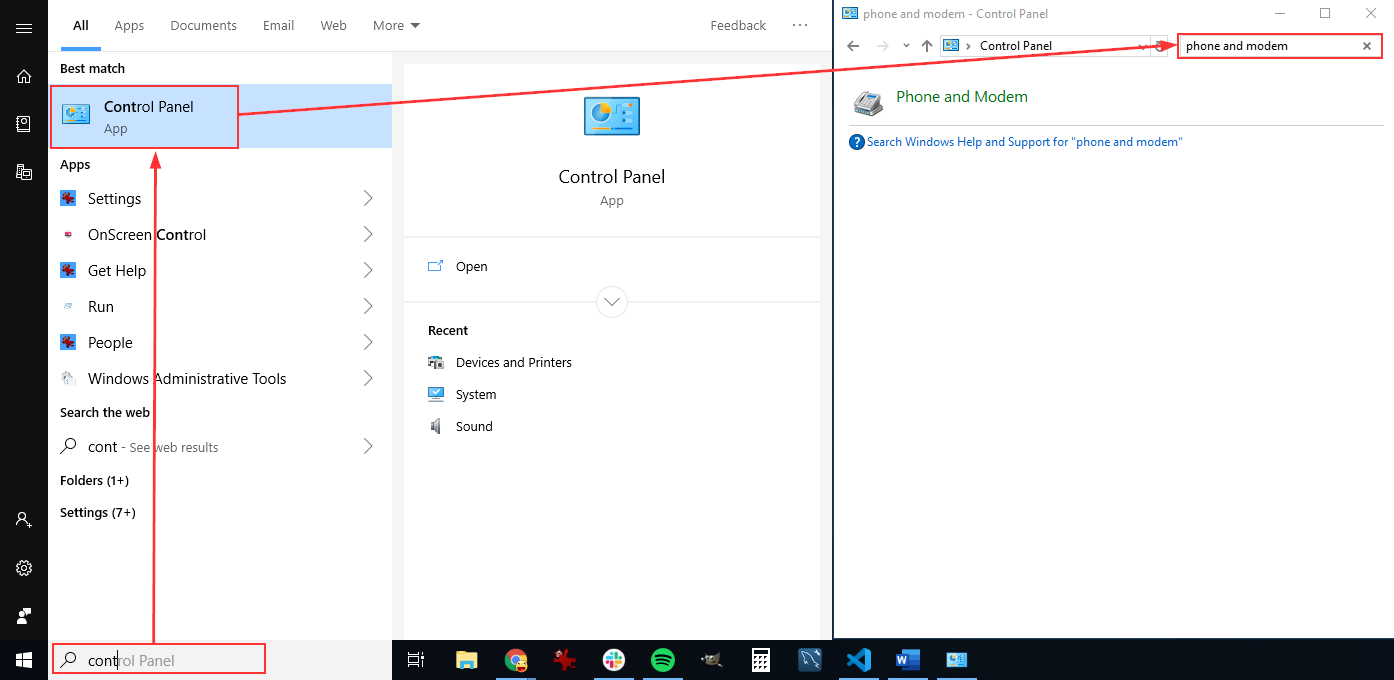
- Click on the Advanced tab
Note: If you have never opened Phone and Modem you may get an initial screen to set up your preferred area code, outbound dialing prefix, etc. If this occurs, set your area code to "1" for USA and Canada. Steps to manually change this are included further down the page for those who are not prompted.
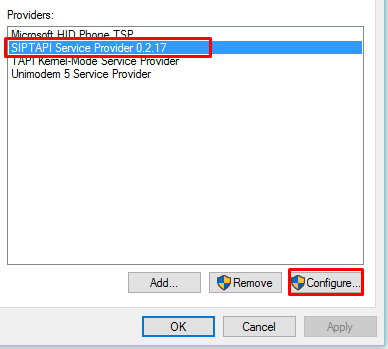
- Select SIPTAPI Service Provider from the list. Your specific version number may vary.
Note: If SIPTAPI doesn't appear in the list, select Add and then find SIPTAPI to add it to the provider list. - Click Configure
- On the next screen fill out the following information
Note: This information is found in "Users>Select a user>Phones>edit" you may need to set up a manual device for this step, once complete you will see the following screen.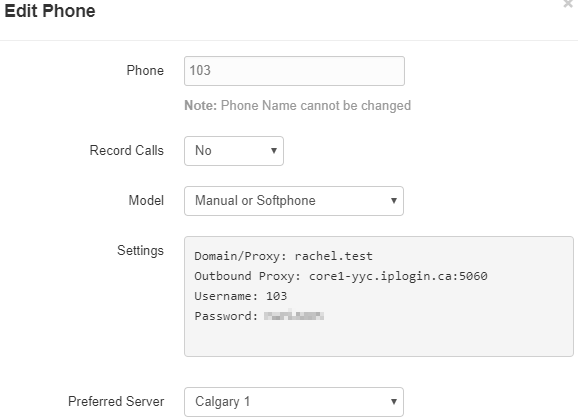
- SIP Domain: Domain/Proxy
- SIP Outbound Proxy: Outbound Proxy
- User: Username
- Password: Password
-
User's extension (optional): The extension you would like to ring when you dial from an application. This does not have to be the same as above.
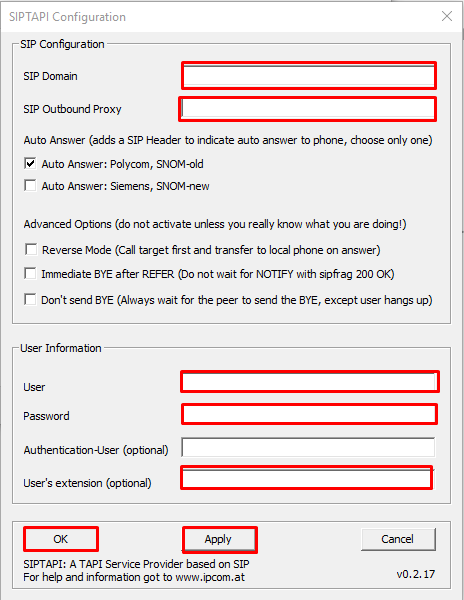
- Click Apply
- Click OK
Removing Country Code to process calls through 10-digit Rule
It will now process calls without adding 1. This will route the call through 10 digit rule and pass the user caller ID info to the dialed number
- On Outlook (if applicable), uncheck “Automatically add country/region code..”

- If you are using Dialer, go to Tools > Dialing properties
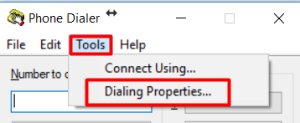
- Edit the Default (example: my location)
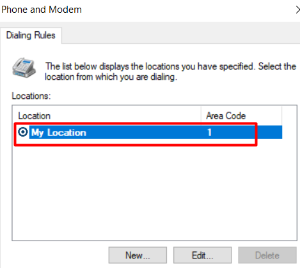
- Configure Country to Canada and area code to 1
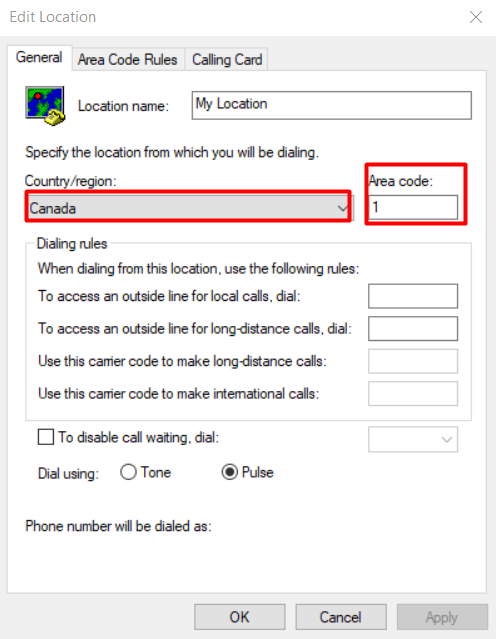
- Click Apply then OK
Testing
- Click Start
- Type Dialer
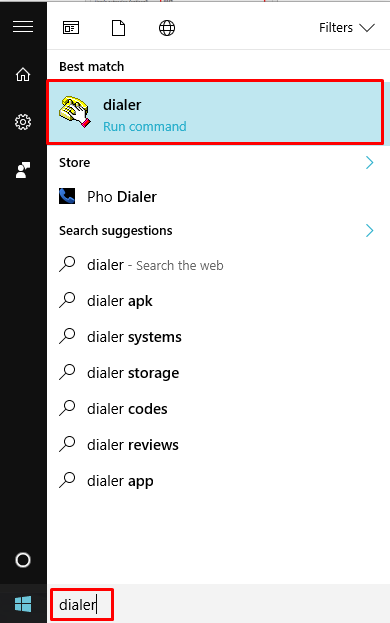
- Enter the number you want to call and click Dial
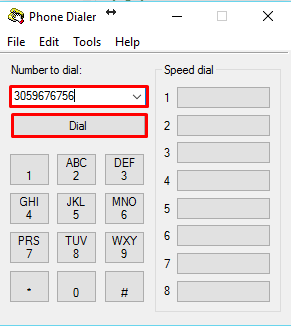
- Your phone will ring. Once you answer you will be connected to the number you dialed
Additional Integrations
- Microsoft Outlook
- ConnectWise
Outlook 2013 Integration
Unfortunately, SIPTAPI was changed with the introduction of office 365, although you can dial using SIPTAPI from the People/Contacts page, you can not dial using their contact card. Many online tutorials suggest adding registry DWORD values; this has been marked as ONLY working as an Office 2010 solution and not Office 2013. Never edit your registry without first creating a complete backup. You are advised NOT to edit your registry if you are unfamiliar with it. Support accepts no liability and will not provide support for any changes made to the registry.