Call Data Record (CDR) Scheduled Exports
Table of Contents
Prerequisites: Adding a CDR Schedule Options Tab Editing/Deleting a CDR Schedule Viewing/Downloading a CDR Schedule’s HistoryPrerequisites:
- Office Manager permissions or higher
It allows for the scheduling of Call Data Record (CDR) exports through the Portal. These exports can be sent via email, FTP, or SFTP or downloaded directly from the Portal. Rather than manually exporting the CDR information in the Call History page, users can have recurring exports of CDRs.
Adding a CDR Schedule
Log into the Portal with a scope of Office Manager and higher, navigate to Call History, and click on Scheduled Exports.
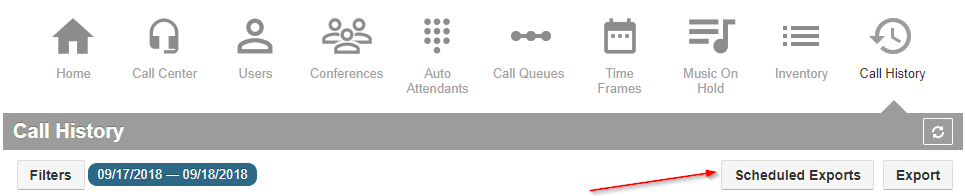
Once in the Scheduled Exports menu, press the New Export button at the upper right of your screen, as shown below.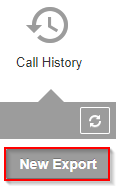
The following window will appear. This allows you to configure specific options for the Report you are scheduling.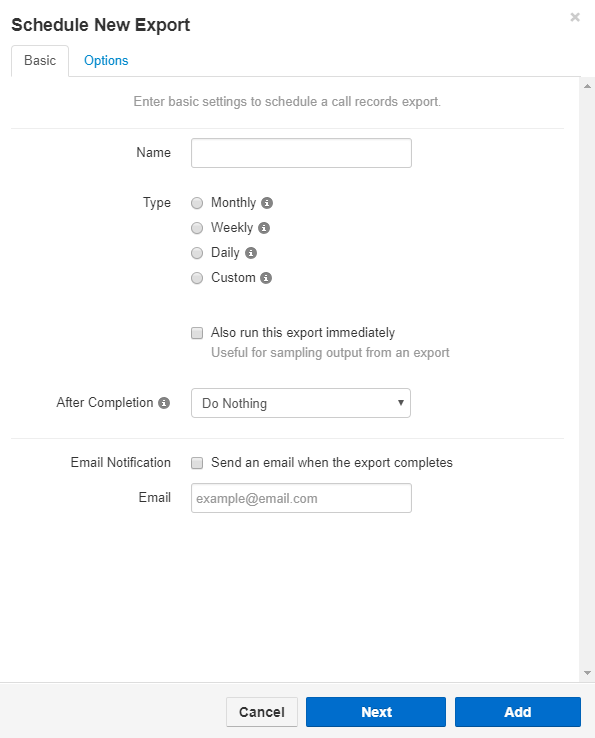
The fields that will be displayed are described below.
- Name - Enter the name of the scheduled report you are creating.
-
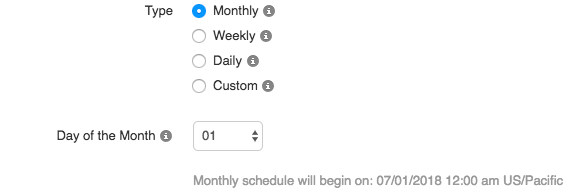
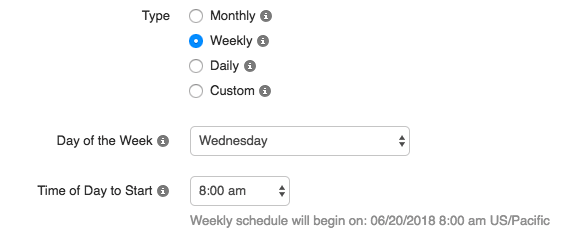
Type - Specify the time duration that the report will cover. The available options are: Monthly, Weekly, Daily and Custom. These are described in more detail below.
NOTE: The time for report execution is based on the time zone of the user creating the scheduled report. All report data is in UTC/GMT.
-
Monthly: This will execute the export on the desired day of the month at 12 a.m. It will capture Call Data Records from that date to the previous month's date, for example, September 3rd to October 3rd, and will repeat again every month.
-
Weekly: This will execute the export on the desired day of the week at the chosen time of day. It will capture Call Data Records from that date to the previous seven days, for example, June 13th to June 20th, and repeat again seven days later.
-
Daily: This will execute the export every day at the chosen time of day, and will capture 24 hours worth of Call Data Records from that time; for example, June 14th 8am to June 15th 8am, and will repeat again 24 hours later.
and capture 24 hours' worth of Call Data Records from that time, -
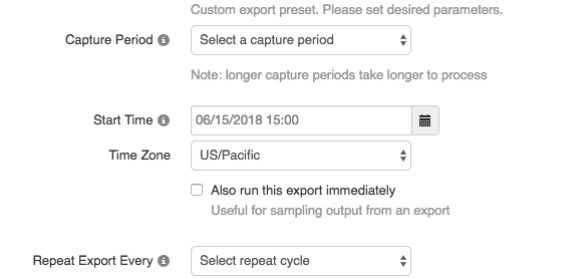
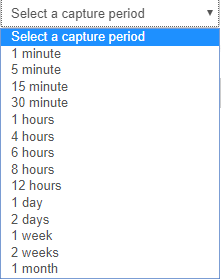
Custom: This will allow users to choose their Capture Period, Start Time, Time Zone and Repeat Cycle. The images below show the various configuration options as well as the drop-down menu options.
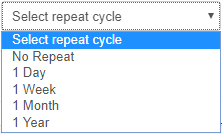
-
Run this export immediately: This will signal the export to be run after creation. This will take the capture period (1 month, 1 week, 1 day, or custom) from the time of creation and create an export, as shown below.

-
After Completion: After the CDRs are compiled, the user can choose from several different options, as shown below.
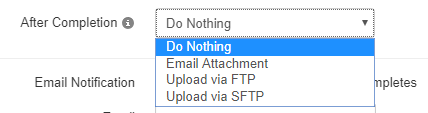
- Do Nothing: This will allow the user to simply download the export from the Portal only. (See Export History)
- Email Attachment: This will allow the user to receive an email that has the export as an attachment
- Upload via FTP/SFTP: This will allow the user to upload the export to a remote repository via FTP/SFTP, provided the user gives the right credentials.
-
Email Notification/Email: This will be automatically required if “Email Attachment” is chosen). The system will email the desired email address notifying you that the export is ready to be downloaded. If the user has “After completion” as an “Email attachment,” the email will contain the attachment.

- After clicking Next, the user is brought to the Options portion of the CDR Schedule, as shown and described below.
Options Tab
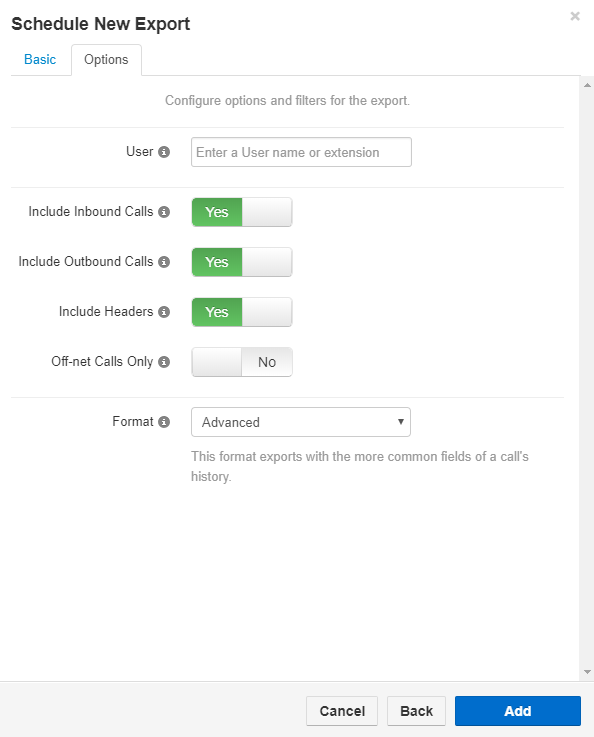
Domain: This allows users to filter out CDRs under one particular domain. Leave blank to see all domain calls. (This option is available to resellers only)
User: This will allow users to filter out CDRs under one particular user. Leave blank to see all user calls.
Include Inbound calls: Toggles whether or not to see inbound calls; the default value is yes.
Include Outbound calls: Toggles whether or not to display outbound calls; the default value is yes.
Include headers: Toggles whether or not to see headers in the generated CSV file; the default value is yes.
Off-net Calls Only: Toggles whether or not to see ONLY off-net calls; the default value is no.
Format: This allows the user to select a pre-defined format with specific fields in each type, as shown and explained below.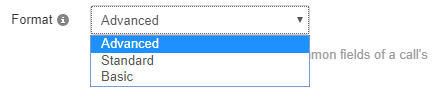
- Advanced (default) includes the following: Call Type, Domain, User, BTN, Time Start, Time Answer, Duration, Remote Number, Dialed Number, Caller ID, origin IP, Term IP, and Release Cause.
- Standard Includes all data associated with a CDR.
- Basic includes the same data fields as if you exported via the Call History page. This includes Call Begin, Call Type, User, BTN, Duration, Disposition, Reason, and Notes.
Press save, and you will create a CDR Schedule.
Editing/Deleting a CDR Schedule
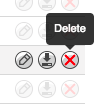
You can edit/delete a CDR Schedule via the edit and delete buttons on the right, as shown below.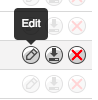
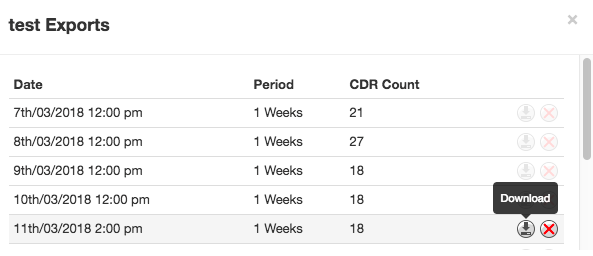
Viewing/Downloading a CDR Schedule’s History
-
The Download button allows you to view and download previous exports and schedules younger than 100 days.
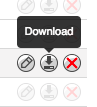
- After clicking this button, the user is brought to an export window. From here, users can choose to Download or Delete a CDR export