How do I configure and use Dashboards? (Wall Boards)
Table of Contents
Prerequisites: Using Dashboards Viewing a Board Adding and Editing a Board Adding a Card Board Settings Sharing a BoardPrerequisites:
- A scope of call center supervisor or higher
This article covers the configuration and usage of the Dashboard feature within the phone portal. This feature allows you to create customized dashboards or wallboards for call center environments.
|
8/13/2019 Please be aware that since the initial release, it has been identified that the public sharing of links is not working as it should. The current temporary solution is changing the link address manually by replacing the domain "https://portal.iplogin.ca/...etc" to "https://core1-yyc.iplogin.ca/...etc" |
Using Dashboards
To access Dashboards, log into the phone portal and navigate to the Call Center page. Then click on the Dashboards button to launch the application.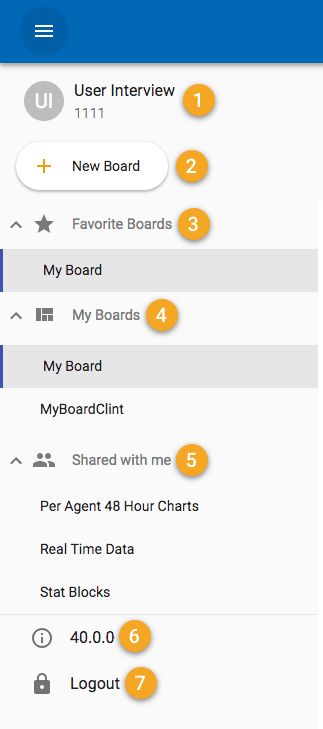
General navigation and viewing boards arelogged-in done using the Main Menu found in the top left corner: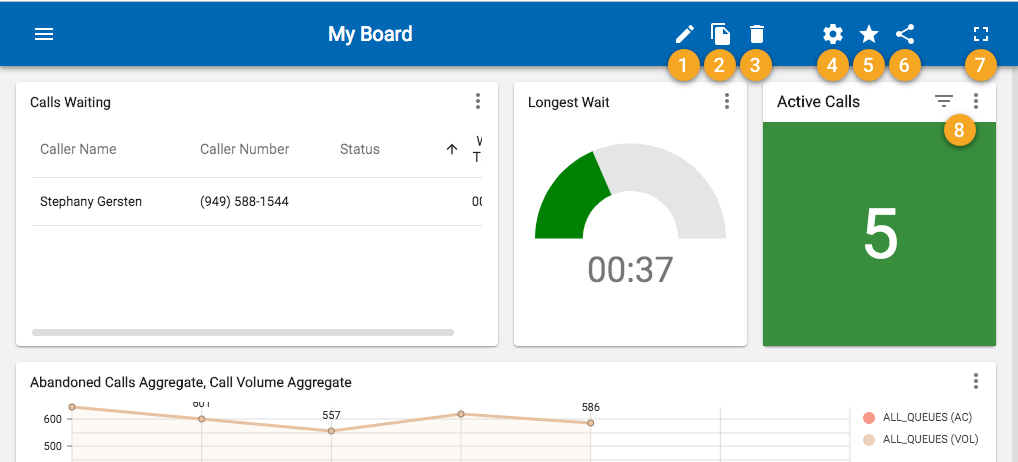 Clicking the main menu button will reveal the side navigation:
|

|
|
Viewing a Board
Here are some of the buttons and actions you can expect to see in the app bar when viewing a board: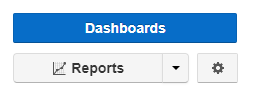
- Edit board: Enter board edit mode, where you can change the cards and contents of the board.
- Copy board: Copy a board and create a duplicate that will appear in your list of boards. Copied boards have all the content and settings from the original board.
- Delete board: Permanently delete a board so it's no longer viewable.
- Board settings: See the "Board settings" section.
- Favourite board: Favorite the board so it shows up in your list of favourite boards in the side navigation.
- Share board: See "Sharing a board" section.
- Enter full screen: Toggle between normal and full-screen viewing.
-
More and filters: The more menu provides a shortcut to specific card actions. If the card has filters on its data set, the filters button will also appear next to it.
- Edit card
- Copy card
- Delete card
Adding and Editing a Board
After adding a new board or editing an existing board, the app bar changes color, indicating you're in edit mode, and some new options become available.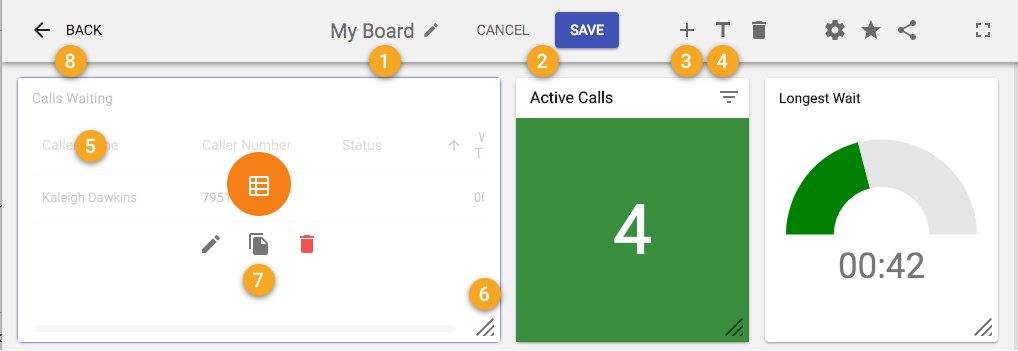
- Edit board name: Change the board's name.
- Save or cancel changes: The save and cancel buttons will appear after making changes to a board. You can save or revert any changes made.
- Add card: See the "Adding a card" section.
- Add header: Add a simple text header to help create card groupings or sections. You can adjust the header width and font size.
- Drag and drop cards: Click and hold on any card, then drag to the desired position.
- Drag to resize cards: Click and hold on the corner handle, then drag to resize.
-
Card hover options: Hover over a card to show some quick actions.
- Edit card
- Copy card
- Filters (if applied)
- Delete card
- Back: Exit edit mode by clicking the back button.
Adding a Card
- Click the Add Card button
- Choose one of the following card types:
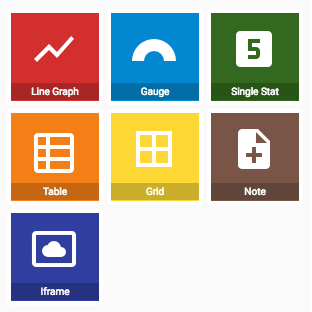
- Line Graph: One or more lines from a data set plotted over time.
- Gauge: A stat value with a gauge that fills to a specified limit.
- Single Stat: A single stat's value.
- Table: Data with multiple stats or descriptive information available in columns.
- Grid: A simple table arranged in a grid format to maximize the number of items. (This data set is currently limited to agents.)
- Note: Customizable text content.
- Iframe: Display external websites or resources.
-
Add data: Depending on the selected card type, one or more data sets can be added to cards.
- Select from a list of data sets compatible with the chosen card type.
- Note and iframe card types only take manual text input.
-
Breakdown: Data sets online graphs can be broken down into separate lines. The breakdown options are: aggregate, per queue, and agent. Specific breakdown options may be limited depending on the data set.
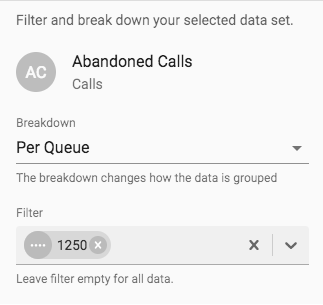
- Filters: Data sets can be filtered by call queues, departments, sites, and agents. (Default filters can also be applied to new cards. See the "Board settings" section.)
- Select from a list of data sets compatible with the chosen card type.
-
Add alerts: Alerts allow you to trigger color changes or browser notifications when a monitored data set crosses a threshold.
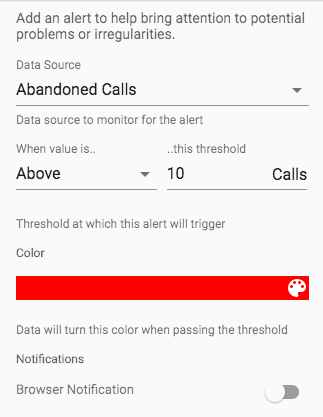
- Select the data set you would like to monitor and set the alert to trigger when it is either above or below the specified threshold.
NOTE: Multiple thresholds must have the same threshold trigger direction. If your first alert triggers when it's above a threshold, the rest of your alerts must also be above their specified threshold. - Select the color of your alert.
- Select the data set you would like to monitor and set the alert to trigger when it is either above or below the specified threshold.
-
Style: Adjust some of the visual settings to fine-tune your card.
- Style settings change depending on the card type.
- Move and resize: Move and resize your card to the desired position.
Board Settings
Within board settings, you can adjust card layout margins, toggle browser notifications for the board, and set default filters that new cards will inherit for their data sets.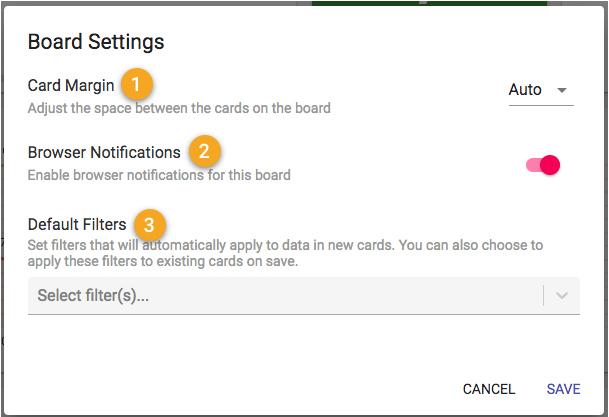
- Card Margin: Adjust the margin space between cards to better-fit display resolutions. You can select auto, 16px, or 24px. The auto option will adjust depending on the view width.
- Browser Notifications: You can enable or disable browser notifications for a board, which allows you to turn off notifications on a board.
- Default Filters: Set filters that will automatically apply to data sets in all new cards within the board. Updating and saving filters here will also allow you to update all existing cards with the new filters.
Sharing a Board
Board-sharing options are available, allowing you to share your board with specific individuals or broad groups. Boards shared with others will appear in their "Boards shared with me" list in the side navigation.
- Share board with... : By default, boards are set to be shared only with specific groups or people. You can change this so the board is shared with everyone in the organization and toggle whether everyone can edit.
-
Share with specific groups or people: To share with specific groups or people, you must add a list of scopes, sites, departments, or people.
- Enter a specific scope, department, site, or person.
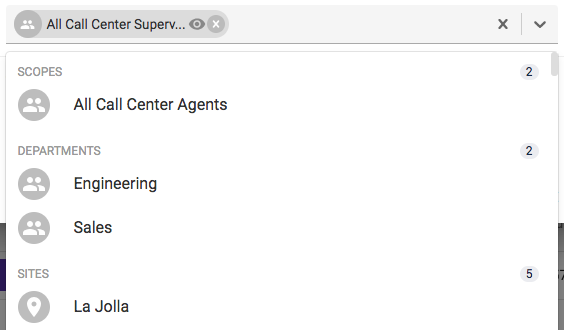
- Configure individual settings to set who can view or edit the board.
- Enter a specific scope, department, site, or person.
-
Share a view-only public link: Sharing a public link with others allows them to view a specific board without logging in.
- Old links can be expired or invalidated by generating a new link.