Yeastar S-Series - Add a SIP Trunk
Prerequisites:
- SIP Trunk Subscription
Tested on Yeastar S20 - Firmware – 30.11.0.28
Note: Caller ID must follow the NPANXX standard. The area code (NPA) must be valid, and the NXX must be a valid NXX. If the Caller ID is not valid, calls will not route properly and must be corrected before calls can be successfully made.
SIP Trunk Setup
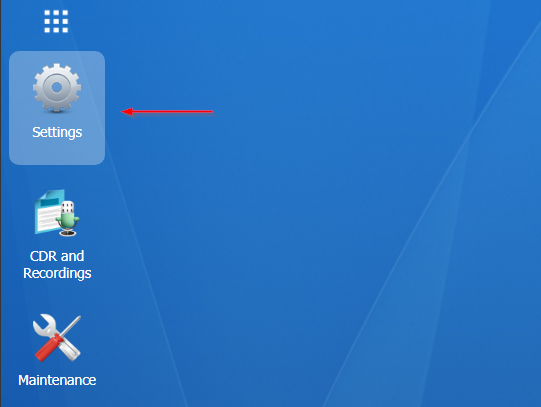
- Log into the Yeastar S20 Device (this assumes that the PBX has already been setup)
- Click on "Settings". This will open the settings panel.
- Under PBX, select "Trunks."
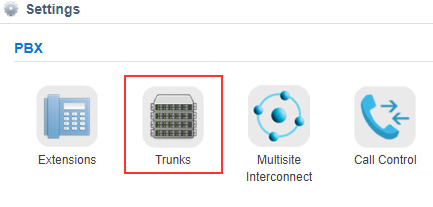
- Click "Add"
- This is where the information from the Portal Trunk settings will be entered.

Enter a Name for the trunk and input the required information. Enable the Outbound Proxy and enter the proxy information provided to you. This is required for the SIP Trunk to register successfully. Domain Name and SIP Username/Password are provided to you when the SIP Trunk is created.- Name - Trunk Name
- Protocol - SIP
- Trunk Type - Register Trunk
- Template - General
- Transport - DNS-NAPTR (required for DNS-SRV on Yeastar PBX's to function correctly)
- Hostname - Trunk Name - port number should be 0 for DNS-SRV support
- Domain - Trunk Name
- Username - SIP Username
- Password - SIP Password
- Authentication Name - SIP Username
- From User - Domain Name or can be left blank
- Caller ID Number - Caller ID number
- Caller ID Name - Caller ID Name or can be left blank
- Outbound Proxy - sip.siplogin.ca - the port number should be 0 for DNS-SRV support
- Select "Codec Tab"
- Select u-law, a-law, G729A and G722 codecs; all others should be removed from the selected column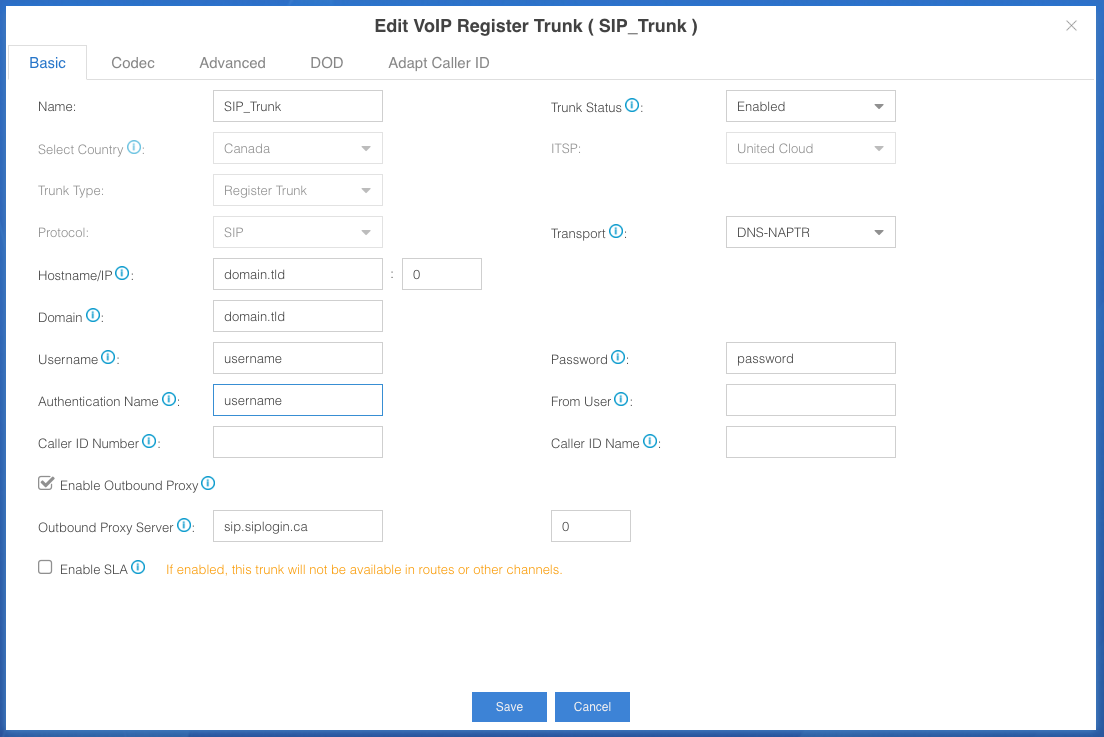
- Select "Advanced Tab"

Add in the DID Number that was provided to you or that you will be using for inbound calls.
uncheck Qualify as it is not used. - Click "Save"
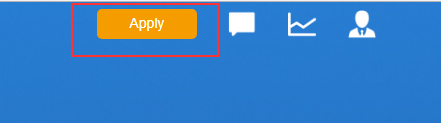
- Click the orange "APPLY" box now present in the top right corner of the screen.
- Now click on the square pattern icon in the top left.

This will open the applications, and select the "PBX Monitor."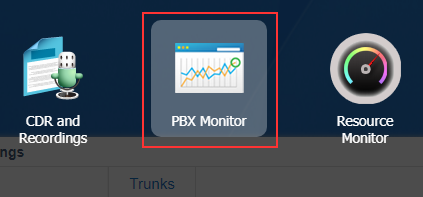
- The PBX Monitor will open; on the left-hand side, select “Trunks", which will bring up a list of trunks.
When the SIP Trunk is registering, it will show a yellow timer icon ; once it has successfully registered, it will turn to a green check mark
 . If it is unable to register successfully, it will show a grey X
  Double-check the settings entered for your SIP trunk if it did not register.
Also, confirm that the S20 has a valid WAN IP address and can access outside the network. - If everything is correct, the SIP Trunk will now be registered and able to be assigned to an Inbound Route.
Additional Settings
Navigate to Settings -> General -> SIP. 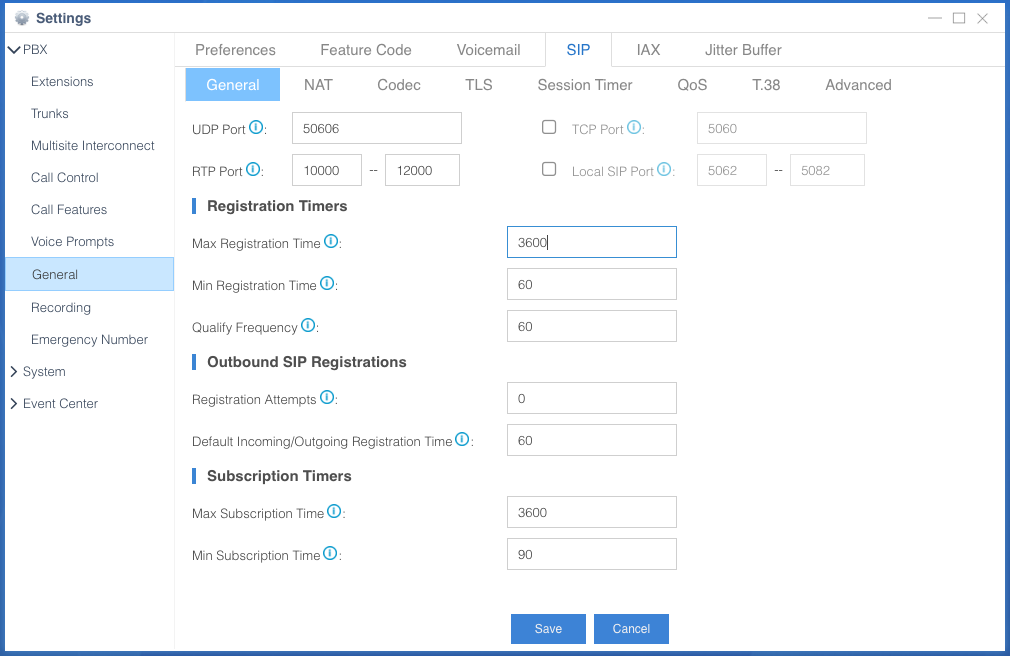 Update the following settings.
- UDP Port: Change this to any random port between 1024 and 50000. This will offer the best security against unwanted registrations.
- Default Incoming/Outgoing Registration Time: Change to 60 to ensure any failover updates are done on time.